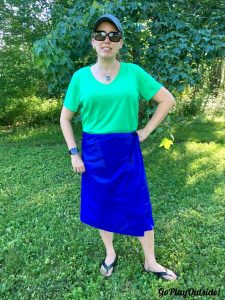
Magoo in Her MYOG Rain Skirt
I decided to make myself a rain skirt. My inspiration was the Zpacks rain kilt. Frosty recently got the Zpacks rain kilt. He is not a fan of rain pants. He is going to see if the rain kilt works for him. If I had been thinking ahead, I would have traced his kilt to make a pattern on butcher paper. Unfortunately, I didn’t think of it. While I was making my rain skirt, Frosty (and the rain kilt) were out section hiking.
I searched and found a how-to video on YouTube from Backcountry Banter about sewing your own rain skirt. His video is excellent and should definitely be watched if you are planning to make your own rain skirt.
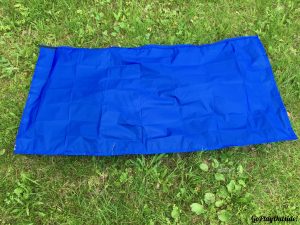
Wraparound Rain Skirt Opened Flat
I got some waterproof (polyurethane coated) ripstop nylon sold by the yard on Amazon.I ordered one yard. One yard of the nylon I ordered is 60 inches wide, so I had plenty of fabric. Silnylon (silicon treated nylon) or cuben fiber (now called Dyneema) would be great options as well. These other fabrics may be lighter, particularly the Dyneema. There may be some challenges to sewing Dyneema. The fabric that I ordered was easy to sew. It didn’t slip or slide as I was feeding it through my sewing machine.
Right now, I should tell you that I sew guerrilla style. I don’t know if that’s the best way to describe it, but it’s the best I’ve come up with. I don’t follow the correct sewing procedures. I like to eyeball seams and in general just wing it.
MYOG Rain Skirt
The skirt I made was wraparound in the style of Backcountry Banter. The Zpack kilt has a zipper. Zpacks has a picture of their skirt opened out flat. I used that as an idea of how to cut the fabric. I drew top and side cut lines with a Sharpie marker right on the fabric and tried to cut just inside the line. I wanted a slight curve to the waist. I used a flexible ruler, and since it wasn’t long enough I just eyeballed the ends.
I wanted straight lines at a slight angle for the sides. I used a broom to get a long, straight edges. I folded the top edge about three quarters of an inch and stitched the hem with polyester thread as recommended by Backcountry Banter. I just folded the edge and eyeballed it as I went, since I didn’t want to take the time to pin the hem.

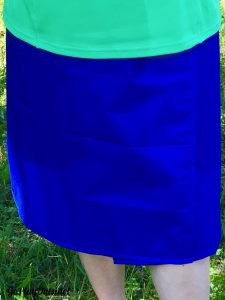
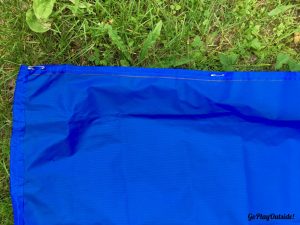
Outer Wrap of the Rain Skirt
I hemmed up the sides in the same manner. Then I checked the length and needed to cut off a good chunk. I folded the skirt in half. I used the Sharpie and flexible ruler again to make a slightly curved cut line. This time I did pin about every four inches, since I was cutting through two layers of fabric. I didn’t want the material to slide as I was cutting it. Then, I hemmed the bottom edge again without pins.
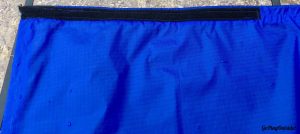
I knew I wanted to have shock cord at the waist to add additional sizing flexibility. I used 3/32 shock cord and a mini cord lock. I still need to burn the end of my shock cord.
Inner Wrap Edge of Rain Skirt
Next, I needed to make the waistband. I folded the top edge over to form the tube. I was going to thread the shock cord through the waist tube after sewing it. Then I decided to put the cord through the tube as I was sewing it. That worked out well. I kept the shock cord in the top edge of the tube on the edge of the presser foot. I finished by stitching down one end of the shock cord to anchor it. The other end will be the adjustable side. It can be pulled tight and secured with a mini cord lock.
I added Velcro to secure the both the inner and outer edges of the wraparound skirt as Backcountry Banter did. I bought sew on Velcro. I didn’t want the adhesive type. I’m not sure how adhesive Velcro would hold up. The sewn on Velcro is softer and more flexible. It was very easy to sew onto the skirt.
Safety Pins to Secure The Outer Wrap Edge of the Rain Skirt in Windy Conditions
I suggest sewing the hook part of the Velcro on the inner wrap part of the skirt. It will be facing out from your body. I think the loop part of my Velcro (on the inner side of my outer wrap) would catch on my clothes, if it were the hook part. If I did a better job lining up the Velcro this might be avoided.
I went outside in the skirt for Squirrel to take a photo. Then a gust of wind blew my skirt flap up. I was glad this happened. I hadn’t anticipated this. Now, I could think of a way to secure the skirt, if it was windy. I decided on just putting a couple safety pins on the edge that can be fastened to batten down against the wind.
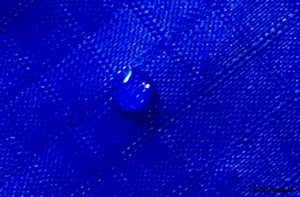
A Drop of Water Beaded up on Rain Skirt
There are so many variables that affect weight: amount of fabric used, amount of Velcro used, amount of shock cord used. That being said, for any curious souls out there, my rain skirt weighs 2.26 ounces.
If I were to make another rain skirt, I would consider the following change.
I would use hook and eye closures for the inside and outside edge fasteners. Some of the hook and eye fasteners are larger, so they would be easier to use and sturdy. I would set the fasteners, so the skirt was pretty loose. I would do all the tightening with the shock cord.